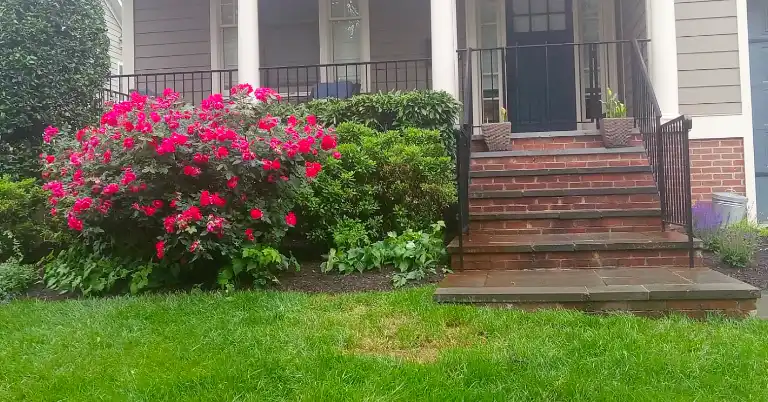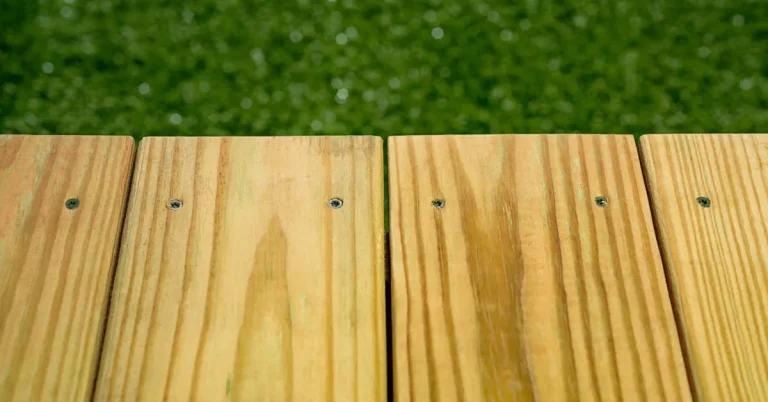
Here’s something I learned after watching too many deck projects fail: rushing stain onto wet pressure-treated wood is one of the fastest ways to waste money. The stain sits on top. It doesn’t sink in. Within months, you’re looking at blotchy spots, peeling patches, and wood that looks worse than if you’d left it bare.
You might be thinking, “Can’t I just apply stain whenever I want?” Not if you want it to last. Pressure-treated wood comes loaded with moisture from the chemical treatment process. That moisture needs somewhere to go before stain can do what it’s designed to do – penetrate the wood fibers and create a protective barrier.
The waiting game isn’t about following some arbitrary industry rule. It’s about physics. Wood that’s still wet from treatment won’t accept stain. Period. The good news? There’s a clear path to getting this right, and once you know what to look for, you won’t have to guess.
What Happens During Pressure Treatment That Affects Staining
Pressure treatment forces chemical preservatives deep into wood fibers using water as the delivery system. The wood goes into a sealed chamber. Air gets vacuumed out. Then copper-based preservatives, dissolved in water, get pushed into the lumber under high pressure.
This process soaks the wood. When you pick up a fresh board at the lumber yard, you’re holding wood with a moisture content somewhere between 75% and 100%. That’s not a typo. The board is more water than wood at that point.
For comparison, wood needs to reach 12% to 16% moisture content before stain can properly bond to it. From 75% to 15% is a massive drop. The wood has to release all that extra water before it’s ready for any kind of finish. This is where people get impatient and make mistakes.
The chemicals themselves also matter. Modern pressure-treated lumber uses micronized copper treatments, which are less harsh than older formulas. This means newer treated wood can actually dry faster than lumber from 10 or 15 years ago. But “faster” still doesn’t mean “immediately.”
The Three-Month Rule and Why It’s Not Always Right
Most contractors will tell you to wait three months. It’s a safe estimate that keeps you out of trouble in most situations. But here’s the thing – that timeline assumes average conditions. You’re not building in average conditions. You’re building wherever you are, with whatever weather you’ve got.
A deck built in Arizona in June will dry faster than the same deck built in Maryland in October. Temperature, humidity, sun exposure, and airflow all affect how quickly moisture leaves the wood. Three months works as a baseline, but it’s not a magic number.
I’ve seen boards ready to stain in six weeks during hot, dry summers. I’ve also seen decks that needed five months because they were built in shade during a humid fall. The wood doesn’t care what month it is. It cares about whether it’s dry enough to accept finish.
This is why testing matters more than counting days on a calendar. You can wait exactly 90 days and still end up with stain that won’t penetrate if conditions kept the wood wet. Or you could test at eight weeks and find the wood is ready ahead of schedule.
The Two Types of Pressure-Treated Wood and Their Different Wait Times
Not all pressure-treated lumber comes out of the mill the same way. Standard “wet” or “green” treated wood is what most people buy. It’s cheaper and widely available, but it’s soaked with moisture. This is the stuff that needs the full drying period.
Then there’s KDAT lumber – Kiln Dried After Treatment. This wood goes through an extra step. After pressure treatment, it’s placed in a large kiln where controlled heat removes most of the moisture. The boards come out with 19% to 25% moisture content instead of 75% or higher.
KDAT lumber changes the timeline completely. You can stain it within days of installation, sometimes immediately if you keep it dry before building. The trade-off is cost. KDAT runs about 15% to 25% higher than standard treated lumber. For homeowners who want to finish their deck quickly, that premium often makes sense.
Look for stamps on the lumber that say “KDAT” or “ADAT” (Air Dried After Treatment). If you don’t see those markings, assume you’re working with wet lumber that needs the full drying time. Mixing the two types can lead to uneven staining since they dry at different rates.
The Water Test: Your Most Reliable Timing Tool
Forget counting weeks. Use the sprinkle test instead. Take a few drops of clean water and put them on the wood surface. Watch what happens next.
If the water beads up and sits there like mercury on glass, the wood is too wet. The moisture inside is preventing the surface from absorbing anything. Wait another week and test again.
If the water soaks into the wood within 10 minutes, you’re good to go. The wood has dried enough to accept stain. This is the green light you’ve been waiting for.
Test multiple spots across your deck, especially areas that get different amounts of sun exposure. The boards in full sun will dry faster than those in shade under a tree. You might find that half your deck is ready while the other half needs more time. That’s normal.
Run this test on different boards, not just in one location. Lumber yards sometimes mix batches, and some boards may have absorbed more treatment solution than others. Five minutes spent testing saves hours of fixing bad stain jobs later.
If you want more precision, buy a moisture meter. These devices give you an exact moisture content reading. For staining, you want the meter to show 12% to 16% moisture or lower. Hardware stores sell basic moisture meters for $20 to $40. It’s a worthwhile investment if you’re doing your own work.
What Affects How Fast Your Wood Dries
Temperature drives everything. Wood dries faster in heat because warm air holds more moisture. A deck built in 85-degree weather will shed water much quicker than one built when it’s 60 degrees out. This is simple thermodynamics working in your favor or against you.
Humidity matters just as much. Dry air pulls moisture from wood. Humid air slows the process down. If you’re in a place where summer humidity stays above 70%, expect longer drying times even when it’s hot. The air is already saturated with water, so it can’t absorb much more from the lumber.
Sunlight accelerates drying, but it’s a double-edged tool. Direct sun helps moisture evaporate. It also causes UV damage to unstained wood, breaking down the surface fibers. This creates a gray, weathered appearance that makes stain penetration harder. The ideal situation is shade during drying, then stain application within six weeks of construction.
Airflow makes a bigger difference than most people realize. A deck with open space underneath and gaps between boards will dry faster than one with poor ventilation. Stagnant air keeps moisture trapped around the wood. Moving air carries it away. This is why elevated decks dry faster than ground-level platforms.
The specific location on your deck matters too. Boards in full sun dry first. Boards under an overhang or near the house stay wet longer. Areas covered by furniture or planters won’t dry at all until you move them. Check the wettest spots on your deck when you’re doing the water test. Those are your limiting factors.
Common Mistakes That Ruin Stain Jobs on Treated Wood
Staining too early tops the list. People get excited about their new deck and want it finished. So they apply stain at four or five weeks, when the wood still has too much moisture. The stain can’t penetrate. It sits on top, forms a film, and starts peeling within months. You end up stripping everything off and starting over.
Skipping the cleaning step is another way to waste stain. Even new wood has mill residue, dirt, and pollen on the surface. Stain applied over dirty wood won’t adhere properly. You need to clean the deck with a deck cleaner or a simple mix of water and detergent. Scrub it down with a brush or use a pressure washer on a low setting. Then let it dry for 24 hours before staining.
Using the wrong stain type causes problems too. Oil-based stains penetrate deeper and work better on pressure-treated wood than most water-based formulas. Some manufacturers make stains specifically designed for treated lumber. These products account for the chemical preservatives and bond better to the wood. Check the label before you buy.
Not accounting for weather is a classic error. You need at least 24 to 48 hours of dry weather after application for the stain to cure properly. If rain hits before the stain dries, water will push the stain out of the wood, leaving blotchy spots and uneven color. Check the forecast, not just for today, but for two days out. Turn off sprinklers too.
Applying stain in direct sun or extreme heat causes the product to dry on the surface before it penetrates. You end up with lap marks and uneven coverage. Morning or late afternoon application works best. If you’re working in summer, start early before the deck gets hot. The wood should be cool to the touch when you apply stain.
The Right Way to Prepare Wood Before Staining
Start by sweeping the entire deck surface. Get rid of leaves, dirt, sawdust, and anything else sitting on the boards. A clean surface is your foundation. Use a stiff deck brush to remove debris stuck in cracks and between boards.
Next comes the cleaning solution. Mix a deck cleaner according to the label directions, or make your own with one cup of trisodium phosphate (TSP) per gallon of water. Apply the solution with a pump sprayer or mop it on. Let it sit for 10 to 15 minutes to break down dirt and mill glaze.
Scrub the deck with a stiff brush, working in the direction of the wood grain. This opens up the pores and removes surface contaminants that would block stain penetration. For larger decks, use a pressure washer on a low setting – around 500 to 600 PSI. Higher pressure can damage the wood fibers and create a fuzzy surface.
Rinse everything thoroughly with clean water. You want to remove all traces of the cleaning solution. Any residue left behind will interfere with stain adhesion. Check the rinse water running off the deck. When it runs clear, you’re done rinsing.
Allow the deck to dry completely before staining. This usually takes 24 to 48 hours depending on weather conditions. Run the water test again just before you start staining to make sure the surface is ready.
Protect areas you don’t want stained. Cover nearby siding, railings, or furniture with drop cloths or plastic sheeting. Use painter’s tape on edges where the deck meets the house. Stain splatters are difficult to remove from some surfaces, so prevention is easier than cleanup.
How to Apply Stain for Best Results
Stir the stain thoroughly before you start. Don’t shake it – that creates bubbles that show up in your finish. Pour the stain into a paint tray or bucket, working with small amounts at a time. This keeps the product from skinning over if you’re working slowly.
Test your chosen stain on an inconspicuous area or scrap piece first. Check the color and make sure it looks how you expected. Some stains look different on treated wood than they do on cedar or untreated pine. This test spot prevents surprises once you’re committed to the full deck.
Apply stain with a pad applicator, brush, or roller depending on your deck size and complexity. Pad applicators work well for flat deck boards and give even coverage without brush marks. Use a brush for edges, railings, and detail work. Start at the farthest point from your exit and work backward so you’re not trapped.
Work board by board, moving from end to end rather than in sections. This technique prevents lap marks where wet stain meets partially dried stain. Keep a wet edge and maintain consistent pressure. One coat is usually enough for new wood. Applying too much stain doesn’t improve protection – it just creates sticky spots that don’t dry properly.
Pay attention to the cut ends of lumber. These areas are more porous and will soak up more stain than the face of the boards. Apply extra stain to end cuts to make sure they’re fully protected. These spots are vulnerable to moisture penetration if left under-protected.
For vertical surfaces like posts and railings, start at the top and work down. This way, any drips get caught and spread as you work. If you start at the bottom, drips from above will create dark spots that are hard to fix.
What to Do If You Already Stained Too Early
If you applied stain before the wood was dry, you’ll see the problems within a few weeks. The stain will look blotchy. Some areas will be dark while others barely show color. The finish might feel sticky or tacky even after it’s supposed to be dry. Peeling can start within months.
You have two options: live with it or fix it properly. Living with it means accepting that your deck won’t look great and the protection will be limited. Most people don’t choose this path once they see how bad it looks.
Fixing it requires stripping the stain off and starting over. Use a deck stripper designed for removing stain from wood. Apply it according to the label directions, let it work for the recommended time, then scrub and rinse. This process removes the failed stain layer and exposes fresh wood.
After stripping, you’re back to square one. Let the wood dry completely – this time following the proper timeline. Run the water test to confirm dryness. Clean the surface again if needed. Then apply stain the right way. It’s more work, but it’s the only way to get a finish that will last.
The cost of doing it twice – materials, labor, and time – almost always exceeds the cost of waiting to do it right the first time. That’s the hard lesson most people learn after rushing the job.
How Long Stain Lasts on Pressure-Treated Wood
A quality stain job on properly dried pressure-treated wood will last three to five years on horizontal surfaces like deck boards. Vertical surfaces such as railings and posts tend to hold up longer – sometimes six to seven years – because they don’t take the same beating from foot traffic and water pooling.
Several factors affect longevity. Sun exposure breaks down stain faster than anything else. A deck in full sun will need restaining sooner than one partially shaded. High foot traffic areas – stairs, entry points, main walkways – wear through stain faster than less-used sections.
The type and quality of stain matters enormously. Oil-based penetrating stains typically outlast water-based products on horizontal surfaces. Stains with UV blockers hold their color longer. Cheaper stains might look fine initially but fade or peel within two years. Spending more on quality stain pays off in longer intervals between maintenance.
Climate plays a role too. Areas with harsh winters, heavy rain, or extreme temperature swings stress the stain more than moderate climates. If you’re in a place with tough weather, plan on the shorter end of the three-to-five-year range.
You’ll know it’s time to restain when water stops beading on the surface and soaks in immediately. That means the protective barrier is gone. You might also see fading, graying, or worn patches in high-traffic areas. Don’t wait for the wood to show serious weathering. Restaining while the wood is still in good condition is easier than trying to restore badly degraded boards.
Maintaining Your Deck Between Staining
Regular cleaning extends the life of your stain. Sweep the deck weekly to remove dirt, leaves, and debris. These materials trap moisture against the wood, which accelerates stain breakdown. A few minutes with a broom prevents bigger problems.
Wash the deck once or twice a year with a mild detergent and water. You don’t need harsh chemicals for routine cleaning. Just remove the buildup of pollen, algae, and grime that accumulates over time. Rinse thoroughly and let the deck dry.
Move furniture and planters periodically. Leaving them in one spot year-round creates moisture traps underneath. The wood can’t dry properly, and the stain degrades faster in those areas. Shift things around a few times during the warm months to let air circulation reach all the boards.
Check for standing water or drainage problems. Water that pools on your deck accelerates wear. Make sure the deck slopes slightly away from the house so water runs off. Clear debris from between boards so water can drain through the gaps.
Inspect the deck annually for signs of damage. Look for loose boards, popped nails, or areas where the stain is wearing thin. Address small issues before they become major repairs. A quick touch-up application of stain on worn spots prevents them from spreading.
Why Blue Collar Scholars Gets Staining Right Every Time
We’ve built enough decks, screened porches, and outdoor structures to know that the finishing step makes or breaks the project. A beautiful deck with failed stain looks worse than an older deck that was properly maintained. That’s why we don’t rush the timing.
When we build with pressure-treated lumber, we educate homeowners about the drying timeline up front. You’ll know when to expect the wood to be ready for stain. We’ll test the moisture content and verify it’s safe to proceed. If you’re using KDAT lumber, we can often finish the project faster because those boards arrive ready to accept stain.
We use commercial-grade stains designed specifically for treated wood. These products penetrate deeper and last longer than consumer-grade options. We apply them during optimal weather conditions – not in direct sun, not before rain, and not when temperatures are too hot or too cold.
Our preparation process matters. We clean every surface properly. We protect your house, plants, and anything else nearby. We apply stain evenly with professional equipment. The result is a finish that looks clean, wears well, and protects your investment for years.
Most importantly, we stand behind our work. If something doesn’t perform as expected, we make it right. That’s the difference between hiring professionals who know what they’re doing and trying to figure it out as you go.
When to Call in Professional Help
Staining a small deck or fence might be a reasonable DIY project if you have the time and patience. But larger jobs, complex structures, or situations where the wood wasn’t properly dried are different. The cost of fixing a failed stain job often exceeds what you would have paid professionals in the first place.
If you’re not sure whether your wood is ready, get a professional opinion. A contractor with experience can tell you whether it’s safe to proceed or if you need to wait. That consultation can save you from an expensive mistake.
When you’re dealing with high-value outdoor structures – large decks, screened porches, outdoor kitchens – the stakes are higher. These projects involve thousands of dollars in materials and construction. Protecting that investment with a properly applied finish makes financial sense.
Professional contractors also have access to better equipment and products. Commercial sprayers, professional-grade stains, and proper surface preparation tools deliver results that are hard to match with homeowner equipment. If you want the best possible outcome, that equipment advantage matters.
Time is another factor. Staining a large deck properly takes days when you account for cleaning, drying, and application. Professionals can complete the same job in a fraction of the time because they have the crew and tools to work efficiently.
Schedule Your Deck Staining Consultation
Blue Collar Scholars handles outdoor projects across Maryland, Northern Virginia, and Washington DC. Whether you need a new deck built, an existing structure stained, or help determining if your wood is ready for finish, we can walk you through the process.
We’ll come to your property, assess the wood’s condition, run moisture tests if needed, and give you a clear timeline for when staining can happen safely. Our estimates include everything – preparation, materials, labor, and cleanup. You’ll know exactly what to expect before we start.
Don’t guess about timing. Don’t risk applying stain before the wood is ready. Get it done right the first time with a team that understands how pressure-treated wood behaves and what it takes to protect it properly.
Contact Blue Collar Scholars today to schedule your consultation. Let’s make sure your outdoor project gets the finish it deserves.