

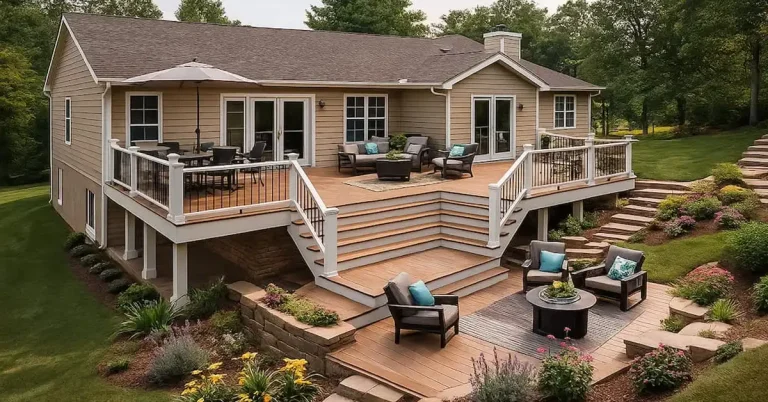
Most Maryland, Virginia, and DC yards slope. Sometimes dramatically, sometimes subtly, but they slope. Building a single-level deck on sloped property means choosing between a deck that sits 3 feet off the ground on one end or extensive grading that costs thousands before you even start construction.
Multi-level deck designs solve this problem by working with the slope instead of fighting it. Each level follows the natural grade, reducing the need for tall posts or expensive excavation. The design creates distinct outdoor zones – dining on one level, lounging on another, grilling on a third – without requiring more total square footage than a single-level deck.
But multi-level construction is more complex than adding another deck section. Each level needs proper structural support. Transitions between levels require safe, code-compliant stairs or ramps. The overall design needs to look intentional rather than like someone kept adding random deck sections whenever they felt like it.
Get this right and you have a multi-level deck design that maximizes usable space while minimizing construction costs. Get it wrong and you’ve built an expensive, awkward structure that doesn’t flow well and costs more to maintain than a simpler design would have.
The difference comes down to understanding how multi-level decks actually work – structurally, functionally, and aesthetically. These aren’t just stacked platforms. They’re interconnected outdoor rooms that need to function as a cohesive system.
Why Sloped Yards Benefit From Multi-Level Deck Design
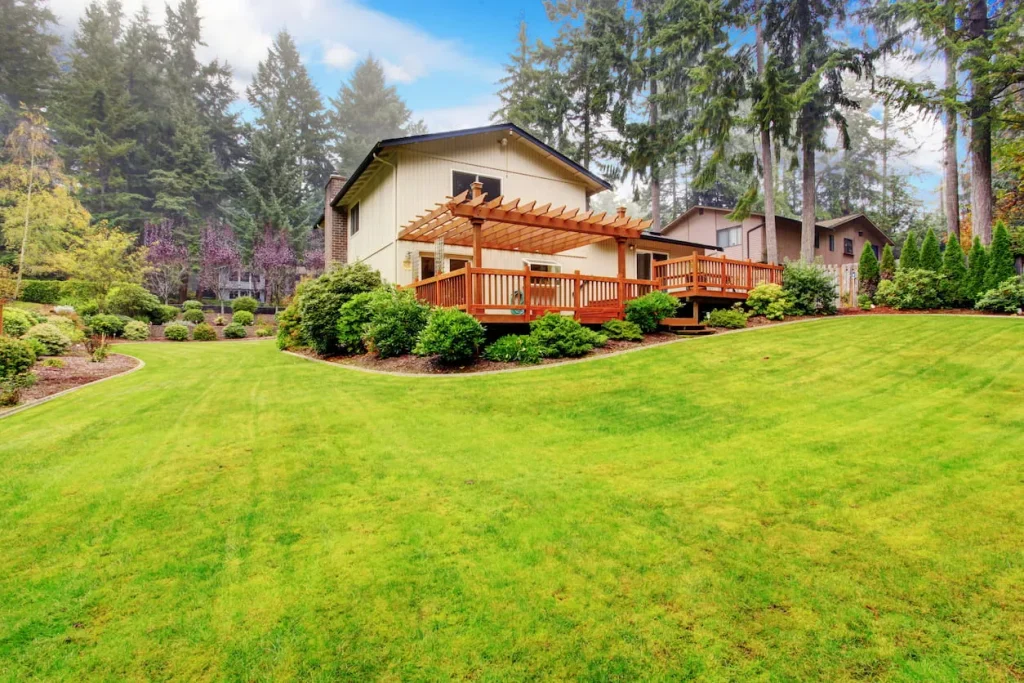
A single-level deck on a sloped lot requires one of three approaches, all problematic. You can build the deck high off the ground where the yard slopes away, creating an elevated platform that needs tall posts, extensive railing, and stairs that feel like climbing a tower. You can grade the yard flat, which means moving significant soil and potentially creating drainage problems. Or you can build the deck low where the yard is highest, which limits size and creates dead space underneath where the slope drops away.
Multi-level design sidesteps all three problems. The upper level sits where the yard is highest, requiring minimal post height. The lower level follows the slope downward, staying close to grade. You’re not fighting the topography – you’re building with it.
This approach reduces material costs significantly. Shorter posts use less lumber. Footings don’t need to go as deep when you’re not supporting massive vertical loads. Joist spans stay within normal ranges rather than requiring engineered beams for huge elevation changes.
The design also creates natural traffic flow. People descend from the house to the upper deck, then step down to the lower deck, then to the yard. Each transition feels logical. Compare this to a single high deck where you walk out the door onto an elevated platform and immediately need to descend a full flight of stairs to reach the yard.
Visual proportions improve with multi-level designs on sloped lots. A single high deck can look like a fortress wall from the yard. Multiple levels break up the mass, creating a more residential scale that integrates with the home’s architecture rather than overwhelming it.
Functionally, the levels create zones without adding square footage. The upper level near the house becomes the dining area. The lower level farther from the house becomes the lounging or fire pit area. The separation happens naturally through elevation change rather than requiring furniture arrangement or planters to define spaces.
Common Multi-Level Deck Configurations That Actually Work
There are several options you have when it comes to multi-level deck ideas for sloped years, including:
- Two-level with small landing deck is the most common configuration. The main deck sits at door height. A smaller landing deck 7-14 inches lower provides transition space before a full staircase to the yard. This works well when your door sits 2-3 feet above grade and you want to reduce the stair count.The landing deck typically measures 4×8 feet or 6×8 feet – enough room for a small seating area or potted plants. Stairs descend from the landing to the yard. The elevation change between main deck and landing is one step, making the transition easy while creating visual interest.
- True two-level with major zones creates distinct outdoor rooms at different heights. The upper level typically runs 200-400 square feet near the house. The lower level matches or exceeds this size, positioned 12-24 inches below. This design works when your yard slopes gradually and you want separated activity areas.A dining set goes on the upper level near the kitchen door. Lounge furniture occupies the lower level where you’re farther from the house. The elevation change is 1-3 steps, enough to feel different but not so much that moving between levels becomes inconvenient.
- Three-level cascade design steps down a steeper slope in stages. Each level drops 12-18 inches from the previous one. This configuration works on yards with more dramatic slopes where two levels can’t address the grade change adequately.Typical layout: upper deck at door height (150-250 square feet), middle level down one flight (200-300 square feet), lower level another flight down (150-200 square feet). Each transition uses 2-4 steps. The design creates three distinct zones while keeping each level close to the ground for safety and aesthetics.
- Wrap-around with level change starts at the back door, wraps around the house corner, and drops to a lower level. This maximizes deck space on corner lots or homes where you want access from multiple doors.The upper level runs along the back wall. At the corner, the deck either steps down or includes stairs to a lower section that continues along the side of the house. This provides two entry points to the deck while working with grade changes around the house perimeter.
- Split-level with connecting bridge creates two separate deck areas connected by a short bridge or boardwalk. This works when obstacles – trees, boulders, existing landscaping – make continuous decking impractical or when you want very distinct outdoor zones.One section serves as the primary entertaining deck. The second section, connected via a 6-8 foot bridge, becomes a quiet sitting area or hot tub platform. The physical separation creates privacy between zones while maintaining connectivity.
Structural Requirements That Separate Safe Multi-Level Deck Designs From Dangerous Ones
Each deck level needs independent structural support. You can’t hang one level off another level’s framing and expect it to stay stable. Every level requires its own footings, posts, and beam system.
Footings for multi-level decks follow the same requirements as single-level decks – they extend below frost line (30 inches in Maryland, 24 inches in Northern Virginia) and use concrete piers sized for the load. The difference is you need more footings for multi-level construction because you have more posts supporting more deck sections.
Post sizing depends on the load each post carries. For typical residential multi-level decks, 4×4 posts work for most applications. Taller posts (over 6 feet) or posts carrying heavy loads (like those supporting multiple deck levels at connection points) need 6×6 sizing. Your local building code and structural requirements determine exact sizing.
Beam connections between levels require careful detailing. Where upper and lower decks meet, the structural systems need to integrate without compromising either deck’s integrity. This often means using shared posts with separate beam connections at different heights, or using independent posts for each level with proper spacing.
Joist sizing and spacing stay consistent with single-level decks – typically 2×8 or 2×10 joists at 16 inches on center for most residential applications. Longer spans require deeper joists or closer spacing. The additional complexity in multi-level design comes from coordinating multiple joist systems at different heights, not from different structural requirements for each level.
Lateral bracing prevents the entire structure from racking or swaying. Multi-level decks need bracing throughout the system, not just at the tallest posts. Cross-bracing between posts or properly installed blocking between joists provides the necessary rigidity.
Ledger attachment to the house follows standard requirements regardless of deck configuration. The ledger bolts to the house’s rim joist (never just to siding), uses proper flashing to prevent water intrusion, and meets code-specified fastener patterns. Multi-level decks often use multiple ledgers at different heights, each requiring proper installation.
Step and Stair Design Between Deck Levels
Steps between deck levels must meet code requirements for riser height and tread depth. Risers typically can’t exceed 7.75 inches in Maryland and Virginia. Treads must be at least 10 inches deep. These measurements aren’t suggestions – they’re legal requirements that affect safety and permit approval.
Consistent riser height throughout the stair run is critical. Varying riser heights cause tripping. If your elevation change divides into even steps, you’re fine. If it doesn’t divide evenly, you need to adjust the deck heights slightly or use different approaches like ramps or split-landing designs.
Width requirements vary by jurisdiction but typically require 36 inches minimum for residential deck stairs. Wider stairs (42-48 inches) feel more comfortable and look more proportional on larger decks. Narrow stairs between levels create bottlenecks and feel cramped.
Handrails become required when you have four or more risers. Even if code doesn’t require them, handrails improve safety on all stairs. The handrail must be graspable (typically 1.25-2 inches in diameter), mount 34-38 inches above the stair nosing, and return to posts or walls at both ends.
Guardrails on the open sides of stairs prevent falls. Balusters must space no more than 4 inches apart – the code specifically prohibits spacing that would allow a 4-inch sphere to pass through. This protects children from falling or getting stuck.
Stair stringers need proper support. Three stringers minimum for stairs wider than 36 inches. Stringers attach securely to both the upper and lower deck framing using approved stair brackets or blocking. Stairs that bounce or flex indicate inadequate support.
Landing requirements apply when stairs change direction or exceed certain rise totals. Most multi-level decks incorporate landings naturally – the lower deck level serves as the landing for stairs from the upper level. But if your design includes stairs that turn or descend more than 12 feet vertically, code may require intermediate landings.
Common Design Mistakes That Make Multi-Level Decks Fail
In our many years of experience, customers can run into some design errors that make their multi-level deck projects collapse. Just a few include:
- Too many levels creates confusion. Every level needs a purpose. Three levels make sense – upper dining, middle lounging, lower fire pit area. Five levels just creates a maze where nobody knows where to put furniture or how to move through the space. More levels doesn’t mean better design.
- Inadequate transition space between levels turns your deck into an obstacle course. Each level needs enough landing area that people aren’t immediately stepping up or down again. Minimum 3 feet of flat deck surface before the next elevation change. Better designs provide 4-6 feet.
- Ignoring sight lines from inside the house creates decks that block views or look awkward from interior rooms. If your kitchen window looks directly at the underside of an upper deck level, you’ve created a visual problem. Design with interior views in mind.
- Mismatched materials between levels makes the deck look like it was built in stages by different contractors. If you use composite decking on one level and pressure-treated on another, or different railing styles, the inconsistency looks unintentional. Maintain material consistency throughout.
- Poor drainage planning lets water collect on lower levels or creates waterfalls during rain. Each level needs proper slope for drainage (1/8 inch per foot minimum). The areas under upper levels need to shed water effectively, not funnel it onto furniture below.
- Undersized footings for combined loads cause structural problems over time. Where posts support connections between two deck levels, the loads add up. Using the same footing size as single-level applications doesn’t account for increased loading. These critical posts need larger footings.
- Stairs positioned where people don’t naturally walk disrupts traffic flow. Stairs should connect where people need to move between levels, not where stairs fit conveniently into the design. Function determines stair location, not aesthetics.
- No clear purpose for each level results in unused space. Every level should have a defined function – dining, lounging, grilling, hot tub, fire pit. Random deck levels with no clear purpose sit empty because homeowners don’t know what to do with them.
Material Selection for Multi-Level Deck Construction

When it comes to multi-level deck construction, you have several options for materials:
- Pressure-treated lumber remains the most cost-effective option for multi-level deck framing. All structural members – posts, beams, joists – should be pressure-treated lumber rated for ground contact, even if they won’t touch the ground. The rating indicates treatment level and durability.For decking boards, pressure-treated works functionally but requires more maintenance than alternatives. The wood will gray without staining, splinters develop over time, and the material expands and contracts with moisture changes.
- Composite decking costs more upfront but requires minimal maintenance. Brands like Trex, TimberTech, and Azek resist rot, won’t splinter, and maintain color without staining. The material works identically on multi-level decks as single-level applications.Over 15-20 years, the maintenance savings offset the initial premium. For multi-level decks where you’re already spending significant money, composite often makes sense.
The downside is composite can’t be used for structural framing. You still need pressure-treated posts, beams, and joists. Only the visible decking and possibly railings use composite materials.
- Cedar or redwood decking provides natural beauty with better rot resistance than untreated lumber. This requires periodic maintenance – annual cleaning and treatment with oil or sealant to maintain color and prevent weathering.For multi-level decks, cedar makes sense when aesthetics matter significantly and you’re willing to maintain the wood. The natural variations in color and grain create visual warmth that composites can’t fully replicate.
- PVC decking offers the ultimate in low maintenance – completely synthetic material that won’t rot, splinter, or fade.PVC works identically across all deck levels and excels in applications where durability matters most – waterfront properties, rental properties, or anywhere you want to minimize long-term maintenance. The premium cost is substantial but justified for some applications.
- Railing systems need to match across all deck levels. Mixing railing styles between levels looks disjointed. Whether you choose wood balusters, cable rail, glass panels, or composite systems, maintain consistency throughout the entire deck structure.Aluminum railings work well for multi-level decks because they’re durable and consistent. The material doesn’t rot or require painting. Black aluminum with tempered glass panels creates a modern look that works across multiple levels without visual competition between sections.
Deck Level Sizing and Proportions That Work
Each level needs sufficient size to serve its intended purpose. A dining level requires at least 12×12 feet for a table and chairs with walking space. Smaller than this and the furniture crowds the available space uncomfortably.
Lounging levels can be smaller if they’re designated quiet areas – 10×12 feet accommodates a couple of lounge chairs and a side table. But if you want seating for guests, plan for 12×16 feet or larger.
The proportions between levels matter as much as absolute sizes. If your upper level is 200 square feet and your lower level is 400 square feet, the visual balance feels off. Generally, keep deck levels within 50% of each other’s size unless you have specific functional reasons for dramatically different proportions.
Width considerations affect usability. Deck levels narrower than 10 feet feel tight and limit furniture arrangements. 12-14 feet wide works better for most applications. Beyond 16 feet wide, you’re creating very large outdoor spaces that may feel oversized for typical residential use.
Depth from the house determines functionality. Shallow decks (8-10 feet) work only for circulation or small seating areas. Functional outdoor rooms need 12-16 feet of depth. Deeper than 20 feet and you’re far from the house, which reduces how often you use the space.
For multi-level designs on slopes, the total footprint often extends 20-30 feet from the house as you step down the grade. This creates visual impact from the yard and requires careful planning to ensure lower levels get adequate sunlight and don’t feel like they’re buried in shadow from upper levels.
Railing Design Across Multiple Deck Levels
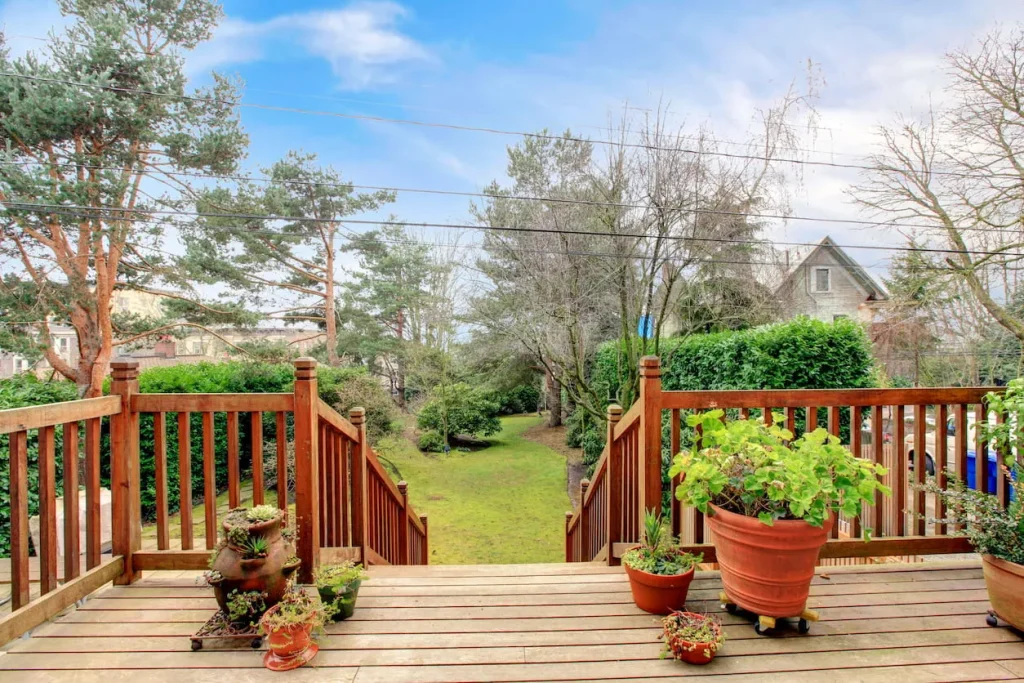
Code requires railings on any deck surface more than 30 inches above grade. Multi-level decks typically need railings on all exposed edges except where stairs or transitions connect levels.
Railing height must be 36 inches minimum measured from the deck surface to the top of the rail. Some jurisdictions require 42 inches for commercial applications or higher elevations. Residential decks typically use 36-inch or 42-inch railing heights.
Baluster spacing can’t exceed 4 inches between any components. This specifically prevents a 4-inch sphere from passing through – the code’s method of ensuring child safety. Metal balusters often space at 3.5 inches to ensure compliance even with measurement variations.
Railing style should remain consistent across all deck levels. Using cable rail on the upper level and wood balusters on the lower level creates visual disconnect. Choose one system and use it throughout.
Post spacing affects both structural integrity and appearance. Posts typically space 4-8 feet apart depending on railing system requirements and structural loads. Closer spacing creates a caged feeling. Wider spacing requires beefier posts and rails to meet structural requirements.
Top rail material determines longevity and maintenance. Wood top rails need periodic refinishing. Composite or aluminum cap rails resist weathering. The top rail sees the most hand contact and sun exposure, making material choice particularly important.
Where levels meet, railing transitions need careful detailing. The railing from the upper level typically stops at the top of stairs leading to the lower level. The lower level’s railing begins at the bottom of those stairs. These transitions need to look intentional, not like an afterthought.
Specific Multi-Level Deck Scenarios and How to Approach Them
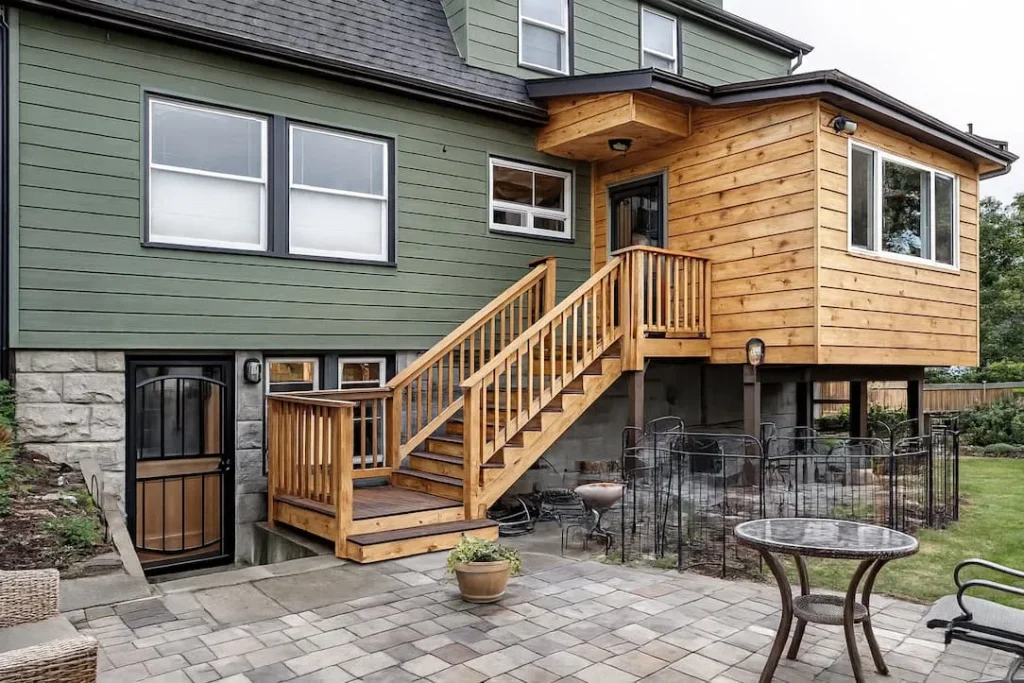
Here are some detailed examples of multi-level deck options and the best way to take on these projects:
- A Walkout basement with main floor door creates a natural two-level opportunity. The upper deck serves the main floor at 8-10 feet above grade. The lower deck serves the basement walkout at grade level. Connect them with stairs or a landing, and you have functional outdoor access from two floors.Design the upper level as the primary entertaining space – larger square footage, better furniture, proximity to the kitchen. The lower level becomes secondary space – perhaps a quiet reading area, hot tub location, or garden access point.
Avoid making the lower level feel like it’s under the upper deck. Either extend the upper deck only partway across the back of the house, leaving open sky over the lower deck, or angle the levels so they don’t stack directly. Nobody wants to sit in shade under another deck surface.
- A Steep slope requiring extensive grading otherwise justifies multi-level design purely on cost savings. If single-level construction requires moving 50 cubic yards of soil, building with the slope instead eliminates that expense.Three levels work well on steep slopes. The upper level sits close to the house at door height. The middle level steps down 12-18 inches and extends farther into the yard. The lower level drops another 12-18 inches and reaches toward the yard’s lowest point.
Each level needs distinct purpose to justify the complexity. Upper – dining. Middle – lounging and conversation. Lower – fire pit or hot tub. The vertical separation creates natural zones without requiring square footage to define spaces.
- A Corner lot with views in two directions benefits from L-shaped multi-level design. One section extends from the back of the house, another section wraps the corner, and the two meet at different elevations following the natural grade.The level change happens at the corner, either through 1-3 steps or a short stair run. This maintains the wrap-around feel while acknowledging the grade change. Each section can orient furniture toward its respective view.
- An Existing patio or lower deck you want to connect creates retrofit multi-level scenarios. You’re building a new upper deck and want to connect it to existing lower-level hardscape or decking.Stairs between the new and existing levels must meet current code even though the existing construction may not. This sometimes requires modifying the existing lower level to make code-compliant transitions possible.
Match materials between new and existing levels if possible. If that’s not feasible, create enough visual separation that the material difference looks intentional rather than like a mismatch. Different stain colors, railing styles, or even substantial distance between levels can make material differences work.
- A Hot tub integration on the lower level works naturally in multi-level designs. The upper deck serves as the main entertainment space. Steps lead down to a smaller lower deck dedicated to the hot tub.This separation provides privacy for hot tub users while keeping the feature accessible. The lower level also handles the weight and water management requirements of a hot tub without those concerns affecting the main deck design.
Electrical and plumbing access is easier at lower deck levels closer to the ground. You’re not running conduit and pipes down 8-foot posts. And if service ever requires access beneath the deck, lower levels are more accessible.
- An Outdoor kitchen or built-in grilling station often works better on a dedicated deck level. The upper level near the house handles dining and general gathering. A lower level or side section incorporates the grill, prep surfaces, and storage.This keeps smoke and heat away from the main gathering area. It also creates a dedicated zone for the cook without feeling isolated from guests on the main deck. Sight lines between levels maintain social connection while separating functions.
Lighting Integration for Multi-Level Decks
Multi-level decks need lighting at transitions to prevent accidents. Stair risers between levels require illumination so people can see where they’re stepping after dark.
Riser lights mount directly to stair risers, illuminating each tread. LED strip lights or individual step lights work well. Space them to light every step, not every other step. The cost is minimal compared to the safety benefit.
Post cap lights on railing posts add ambient lighting while defining deck perimeters. They create subtle illumination that doesn’t compete with other light sources but prevents the edges of each level from disappearing in darkness.
Recessed deck lights install between decking boards or in stair risers. They provide downward light that marks transitions without creating glare. Use them at level changes, stair locations, and along walking paths.
Overhead string lights work across multiple levels if you plan mounting points carefully. Run cables from upper deck posts to lower deck posts, creating layers of lighting that follow the elevation changes. The lights define the overall deck space while adding ambiance.
Low-voltage systems work best for most deck lighting applications. They’re safer than line voltage, easier to install, and sufficient for LED fixtures. A single transformer can power lighting across multiple deck levels.
Include lighting circuits in your initial construction plans. Running wire through framing during construction is simple. Retrofitting lighting after the deck is complete requires surface-mounted conduit or fishing wires through completed framing – much harder.
Separate switches control different lighting zones. Upper deck lights on one circuit, lower deck lights on another, stair lights on a third. This lets you light portions of the deck without illuminating everything.
Drainage Management Across Multi-Level Decks
Water needs clear paths to escape from every deck level. Standing water causes rot, creates slipping hazards, and indicates drainage problems that will worsen over time.
Slope each deck level 1/8 inch per foot away from the house. This minimal slope is barely perceptible but moves water effectively. On multi-level decks, ensure water from upper levels doesn’t simply drain onto lower levels.
Flashing between the house and deck prevents water intrusion into the home’s structure. Multi-level decks often attach at multiple heights, requiring flashing at each ledger connection. Missing or inadequate flashing causes rot in the house’s rim joist and siding.
The space between deck levels needs drainage consideration. If your upper deck is 8 feet above grade and your lower deck is 4 feet above grade, water dripping from the upper deck’s perimeter can erode soil or collect around lower deck posts.
Gutter systems can be added to the underside of upper deck levels to collect and channel dripping water. This adds cost but solves erosion problems and keeps lower level areas drier. Downspouts direct the collected water away from the deck structure entirely.
Ground-level drainage around all deck posts prevents water accumulation that leads to frost heave and post movement. Gravel beds around post bases facilitate drainage. Proper grading ensures water flows away from footings rather than pooling around them.
Under-deck drainage systems like Trex RainEscape or TimberTech DrySpace can be installed beneath upper deck levels. These systems catch water dripping through deck board gaps and channel it to gutters, creating dry space underneath upper deck levels.
Furniture Arrangement and Space Planning for Each Deck Level
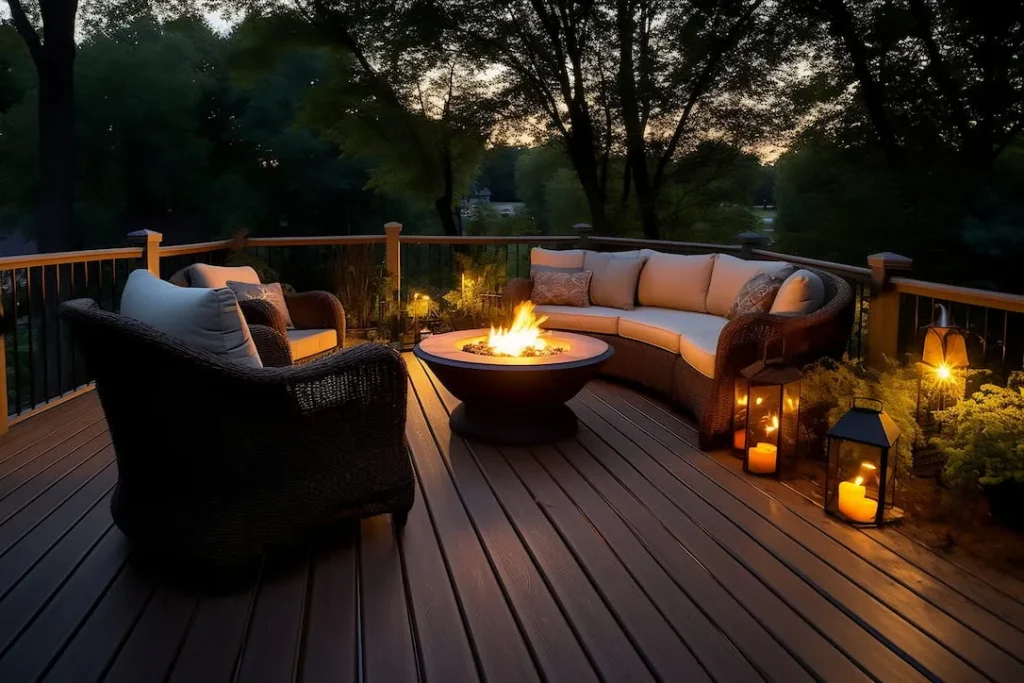
Each deck level needs furniture scaled appropriately to the space. Oversized furniture on small deck levels creates crowding. Undersized furniture on large decks looks lost and doesn’t define spaces effectively.
- Upper level dining areas require tables sized for regular use. A 6-foot table seats 6-8 people comfortably. Add 36 inches around all sides for chair space and circulation. This means a 6-foot table needs roughly 12×12 feet of deck space minimum.Position dining furniture near the house door for food service convenience. Orient the table so people seated have views outward rather than staring at the house wall. If you have multiple exposure sides, angle the table to maximize sightlines.
- Lower level lounging areas use different furniture types – deep seating, sectionals, lounge chairs. These pieces spread out more than dining furniture. Plan 14-16 feet of deck width for a conversation arrangement with a sectional or multiple chairs.Create furniture groupings that encourage conversation. Face pieces toward each other rather than lining them against railings. Leave 18-24 inches between furniture for walking paths. The goal is comfortable, functional arrangement that invites use.
- Fire pit or hot tub levels need clear circulation space around the feature. Fire pits require 3-foot clearances on all sides from combustible materials. Hot tubs need access for service and enough surrounding space that people don’t crowd right up against the edge.Add seating around these features – built-in benches work well because they don’t require furniture arrangement. If using loose furniture, choose pieces that handle the feature’s heat or moisture without deteriorating.
- Transition areas between levels shouldn’t be cluttered with furniture. Keep stair landings and the immediate areas around level changes clear. People need space to navigate transitions without squeezing around furniture.That said, built-in benches flanking stairs can work if they’re set back enough to maintain clear circulation paths. These features provide occasional seating without impeding movement.
Permit and Code Requirements for Multi-Level Construction
Most jurisdictions require permits for deck construction. Maryland and Virginia typically mandate permits for decks attached to houses, decks over 200 square feet, or decks more than 30 inches above grade. Multi-level decks almost always trigger permit requirements.
Submit plans showing all levels, dimensions, structural details, and how the design meets code. Many jurisdictions require engineered drawings for complex multi-level designs or decks supporting unusual loads. A structural engineer stamps the plans, certifying they meet code requirements.
Code requirements for multi-level decks follow the same structural standards as single-level decks, but inspectors pay extra attention to transitions between levels. Stair construction, handrail installation, and guardrail compliance get scrutinized carefully.
Setback requirements determine how close you can build to property lines. Most residential areas require 5-10 feet setback from side and rear property lines. Measure from the deck’s edge, including any cantilevers or overhangs.
Height restrictions in some jurisdictions limit how tall structures can be above grade. This rarely affects typical multi-level deck construction but matters in historic districts or areas with specific design standards.
Inspections happen at critical construction phases – after footings are dug but before concrete is poured, after framing is complete but before decking is installed, and sometimes a final inspection after completion. Schedule inspections properly to avoid delays.
HOA approval precedes permit applications in communities with homeowners associations. Submit your design to the architectural review committee. Many HOAs have specific requirements about deck materials, colors, and designs. Get written approval before submitting permit applications to the jurisdiction.
Maintenance Differences for Multi-Level Decks
Multi-level decks require the same maintenance as single-level decks – cleaning, inspection, and periodic refinishing. The difference is you have more surface area and more transitions to maintain.
Annual cleaning removes dirt, pollen, and organic growth. Pressure washing works but requires care around stairs and transitions where water can accumulate. Low-pressure washing with deck cleaner is safer for most materials and still removes buildup effectively.
Pressure-treated decks need staining or sealing every 2-3 years. Composite decks need only occasional cleaning. Cedar requires annual treatment to maintain color. The material you choose determines maintenance frequency more than the multi-level configuration.
Inspect structural components annually. Check posts for rot or insect damage. Examine beam connections for looseness. Look at joist hangers and fasteners for corrosion. Test railings for stability. Multi-level decks have more structural points to inspect, so budget extra time.
Stair components wear faster than deck surfaces due to concentrated foot traffic. Inspect stair treads, stringers, and handrails carefully. Tighten loose fasteners before they allow movement that leads to bigger problems.
Drainage system maintenance matters more on multi-level decks. Clean gutters if you’ve installed under-deck drainage. Check that water flows away from posts and footings. Remove debris that accumulates at level transitions.
The areas under upper deck levels need attention too. Leaves and debris collect in these spaces. Water stains develop on lower deck surfaces if upper deck drainage isn’t working correctly. Regular inspection catches these issues early.
When Multi-Level Design Doesn’t Make Sense
Flat yards rarely benefit from multi-level decks. If your yard is essentially level, building multiple deck levels creates unnecessary complexity and cost. Single-level designs work better on flat terrain.
Very small total deck footprints don’t justify multi-level construction. If you only have space and budget for 200 square feet total, splitting that into two 100-square-foot levels creates spaces too small to use effectively. Keep it single-level.
When every level would be more than 6 feet above grade, multi-level design loses its cost advantage. You’re still building tall posts and extensive railings. At that point, a single elevated deck with stairs to the yard makes more sense.
Properties with very steep slopes – greater than 20% grade – often need extensive retaining walls or grading work regardless of deck configuration. Multi-level design helps but doesn’t eliminate major site work on extremely steep terrain.
Budget-constrained projects should consider single-level designs. Multi-level construction costs 15-25% more than single-level. If budget is tight, maximize single-level deck size rather than adding complexity through multiple levels.
Homes with active young children sometimes work better with single-level decks. Multiple elevation changes create tripping hazards and fall risks. While proper railings provide safety, some families prefer the simpler supervision of single-level spaces.
How We Design and Build Multi-Level Decks
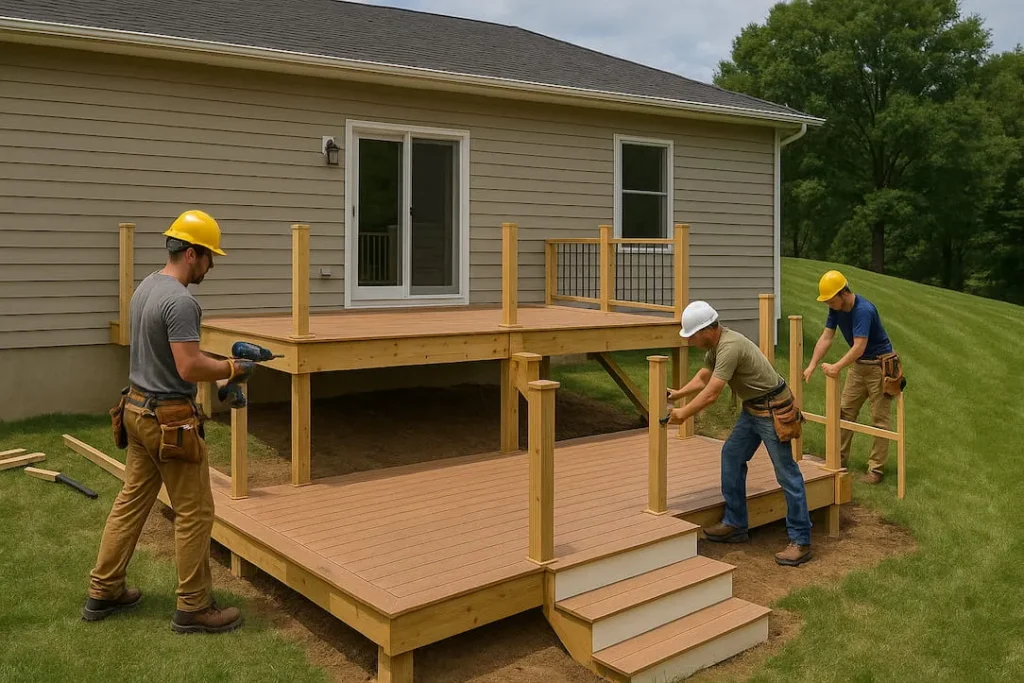
We start every multi-level deck project by evaluating your yard’s topography. We’re looking at existing slopes, drainage patterns, sun exposure at different elevations, and views from each potential deck level. This assessment determines whether multi-level design actually benefits your property.
Then we discuss how you’ll use the space. Do you need distinct zones for different activities? Do you entertain large groups or prefer intimate gatherings? Will you use the deck year-round or seasonally? These usage patterns shape the design more than any aesthetic preferences.
Our structural approach follows code requirements exactly. Every post sits on a properly-sized concrete footing extending below frost line. Every beam connection uses appropriate hardware. Every stair meets tread and riser requirements. We don’t cut corners on structural elements that determine longevity and safety.
Material recommendations balance your budget, maintenance tolerance, and aesthetic goals. We explain the real differences between pressure-treated and composite – not just cost, but long-term maintenance requirements and expected lifespan. The choice is yours, but you’ll make it with complete information.
We handle all permit applications and work with local inspectors throughout construction. You won’t deal with code officials or inspection scheduling – that’s our responsibility. We know what Montgomery County, Fairfax County, Arlington, and other jurisdictions require because we build there constantly.
Construction sequencing matters on multi-level projects. We excavate for all footings before pouring any concrete. We frame all levels before installing any decking. This approach is more efficient and produces better results than building one level at a time.
Railing installation happens after decking is complete but before furniture arrives. We measure actual post spacing rather than relying on plans because real-world dimensions sometimes vary slightly. This ensures railings fit precisely.
Final inspection includes checking every stair tread for consistent height, testing all railings for stability, and verifying drainage slopes. We don’t consider the job complete until everything meets both code requirements and our own quality standards.
We provide maintenance guidance specific to your deck materials. You’ll know how often to clean, when to reseal or restain, what to inspect annually, and when to call for professional service versus handling tasks yourself.
Real Advantages of Multi-Level Deck Design
The primary advantage is working with your property’s natural contours instead of fighting them. On sloped lots, this saves thousands in grading costs while creating more usable outdoor space than single-level alternatives.
Functional separation happens naturally through elevation changes. You don’t need planters, furniture arrangement, or partial walls to define dining versus lounging areas. The level change creates the boundary.
Visual interest increases significantly. Multi-level decks have depth and dimension that single-level decks can’t match. From the yard, the structure looks substantial and intentionally designed rather than like a simple platform.
The design often increases total usable deck space. Where a single high deck might require extensive stairs that consume square footage, multi-level design turns those vertical transitions into additional deck area.
Property values reflect thoughtful outdoor design. Well-executed multi-level decks add more value than equivalent-square-footage single-level decks because they demonstrate intentional design and maximize property potential.
Privacy improves on certain designs where lower levels feel separated from neighbors’ sightlines. The upper level might be visible, but a lower level tucked below grade level and behind landscape screening creates truly private outdoor space.
Making the Right Decision for Your Property
Multi-level deck design makes sense when three things line up: your property slopes significantly, you want distinct outdoor zones, and your budget has room for the added complexity. When those conditions align, a multi-level deck outperforms any single-level alternative. When they don’t, you’re just adding cost.
The difference between a deck you use constantly and one that looks good in photos comes down to design and execution. How levels transition, where stairs land, how each zone is sized all matter more than most people realize.
We’ve built multi-level decks across Maryland, Virginia, and DC for 15 years and can walk your property and give you a straight answer on whether it makes sense for your situation. No pressure, no pitch. Just an honest assessment and a clear proposal if it’s the right fit.
Let’s talk about how to make that happen.
Frequently Asked Questions: Multi-Level Deck Designs for Sloped Yards
What is a multi-level deck, and why is it ideal for sloped yards?
A multi-level deck uses two or more connected deck levels that follow your yard’s natural terrain. Instead of fighting the slope with tall posts or expensive grading, each level sits close to the ground, reducing materials and improving traffic flow throughout the space.
How do multi-level decks improve outdoor usability compared to a single-level deck?
Multi-level designs naturally create separate “outdoor rooms” — such as dining, lounging, grilling, or fire pit areas — without adding extra square footage. Elevation changes define zones organically while keeping movement intuitive and comfortable.
What are the most common multi-level deck configurations?
Popular configurations include:
– Two-level decks with a small landing
– True two-level decks with distinct activity zones
– Three-level cascading decks for steeper slopes
– Wrap-around decks with level changes
– Split-level decks connected with small bridges
– Each option depends on your yard’s slope and the functionality you want.
What structural requirements are important for multi-level decks?
Every level needs its own footings, posts, and beams. Proper joist sizing, ledger attachment, lateral bracing, and code-compliant stairs are essential. Multi-level decks follow the same structural rules as single-level decks but require more footings and additional attention at transitions.
How should stairs and transitions between deck levels be designed?
All steps must meet codes for riser height, tread depth, handrails, and baluster spacing. Transitions require at least 3 feet of flat landing space (ideally 4–6 feet), and stair placement should follow natural traffic patterns to avoid bottlenecks and tripping hazards.